
How to Add and Configure Custom Fields
- nmonds

- Nov 5, 2021
- 2 min read
Updated: Feb 24, 2022
Users with the appropriate permissions are able to add fields to certain modules in ChilliDB to ensure they are able to gather the information they require. This is done via a section called "Custom Fields", where it is possible to create both new fields and sections (collections of fields). These custom fields can be managed from within the system. To manage custom fields, first users must be able to log into ChilliDB as a user in a role with the Security Ticket “CRM CORE - SYSTEM CUSTOM FIELDS MANAGER - Manage Custom Fields”. To give this permission to a user, go to the "System" main menu item and then choose "Users" - "Maintain Roles + Tickets". Click on the role the ticket is to be assigned to and then either search for 'Custom Fields', or scroll through the tickets until finding the ticket listed above.

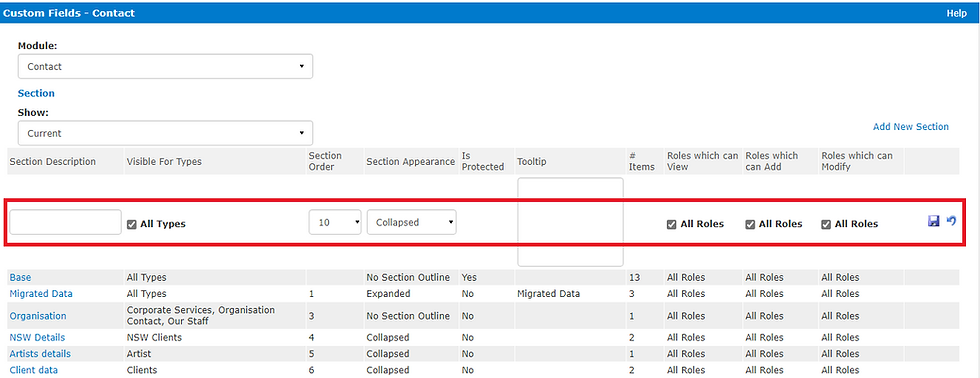
Access the Custom Fields Maintenance tool by navigating to the "System" menu item and selecting "Custom Fields" - "Create and Maintain". To edit Custom Fields, first select the module in which the new section/field is to be created(e.g.: "Contact", "Organisation" and so on).

Users will then see a table with a list of 'Sections'. Each section groups related fields together.

To add a new Section, users can click the 'Add New Section' link, which will create a new row in the table. Each section requires a name. Some modules will then allow users to configure each section to limit the displaying of the section they are creating to certain 'Type' values - e.g.: if creating a new section for the Contacts module, users can choose an available contact category under 'Visible for Types' that limits the viewing of the section to only contacts that are being created using that categorisation. After configuring the Order the section is to appear on the screen, click the blue computer disk icon to save the record. Once the record is saved, users can go back and edit the record by clicking the white grid and pencil icon.
When looking to edit the fields in a section, users can drill down to them by clicking the section name. Once this has been done, the fields for that section will be visible. Each field available here will be displayed as a field on the relevant screen in the module it relates to. Users can expire a field, or a section (and all of its fields) by clicking on the red 'X' . Any existing uses of that field will still be visible on the appropriate records but will not be editable. It will also show as EXPIRED. To move a field into a different section, click on the blue four-way arrow next to the expiry icon.
Note: If wanting to move a field into a newly-created section, the section must be created first before moving the field.

To change the configuration of a pre-existing field, click on the field to be changed in the 'Field Description' list. This opens a 'Field Settings' box where users can make any necessary changes. Click 'Save' when finished reconfiguring the field.


Comments